Willow Tree Process (Part 3) – Foliage In the Round, Trunk texturing too!

Last time, we left off with the start of some great foliage for our willow tree, but the placement overall was a bit sparse.

Today, we’ll look in to ways of bulking up the foliage so that it looks more healthy.

At this stage, the easiest way to develop a stronger silhouette from all angles is to consider the foliage as multiple pieces of a whole, each varying in size but as a whole ‘mounding’ or ‘padding’ in key areas.

There are a few different techniques available for the tree-making process, but because we’re dealing with a tree that has somewhat out-of-the-ordinary foliage, I’ve chosen to create planes of geometry which have been mapped to parts of a larger texture and to have each of these planes intersect at a common area, to simulate a branch.


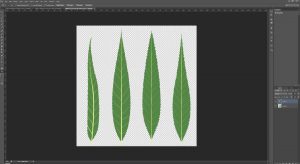
Here, I’ve used much the same process as last time to create a variety of different foliage shapes based upon some underlying branch drawings.

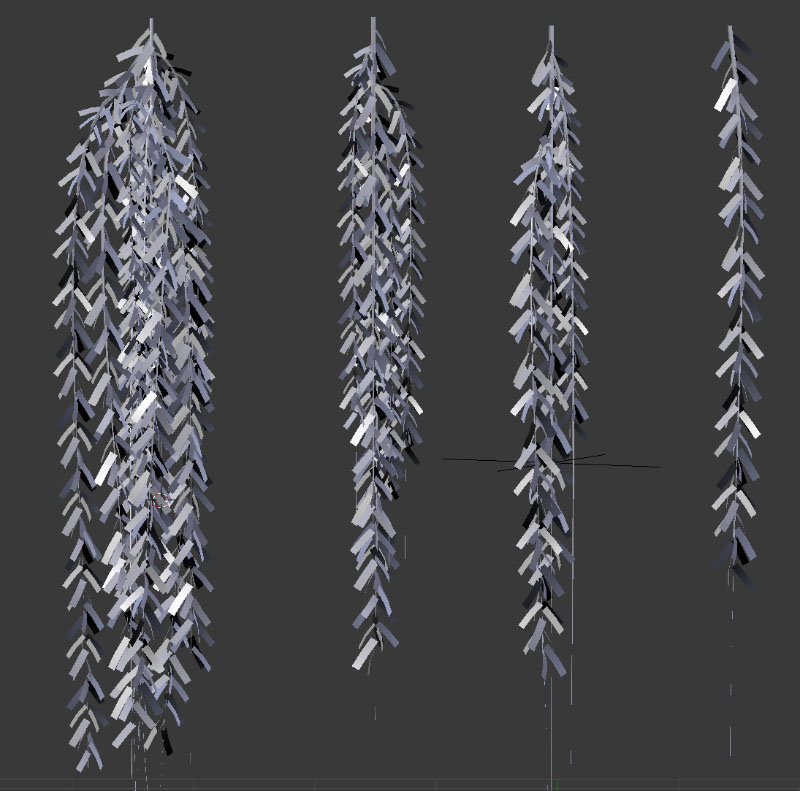
The same leaves and stems we used for the sideways texture are repurposed here, again with the help of bezier curves, which allow for non-destructive manipulation of geometry when a ‘curve’ modifier is added to the mesh object.

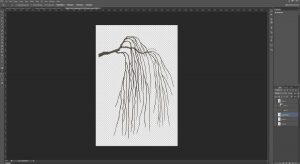
A gentle sweeping shape is added to the plane to simulate the slight upward growth, then strong downward plunge of foliage due to gravity. Once I have a shape I’m happy with, the geometry gets duplicated and resized, then I’ll take the geometry and map it to a different strand of foliage within the same UV map for some variety.


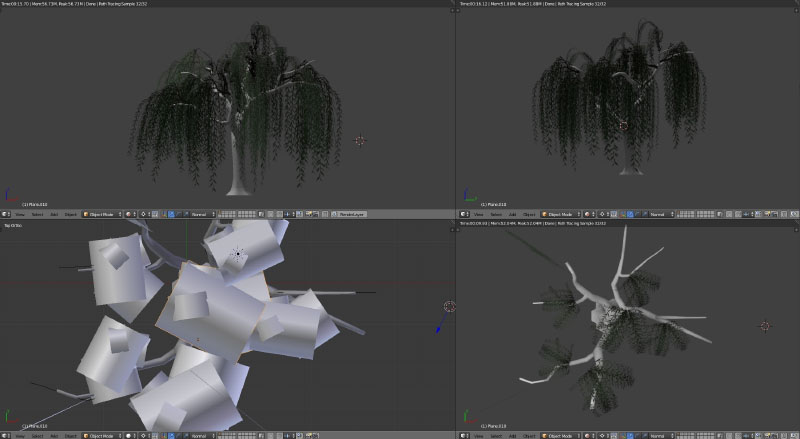
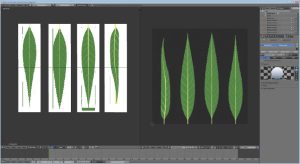
At this point, I split up my 3D view so that one view is using a rendered view and the other is solid or wireframe to properly place each piece so they intersect properly.

Once I have a cluster of this type of foliage that I’m happy with, it gets placed in strategic places where the other foliage type was lacking. It can also be helpful to hide the other foliage material temporarily to aid in clear placement.

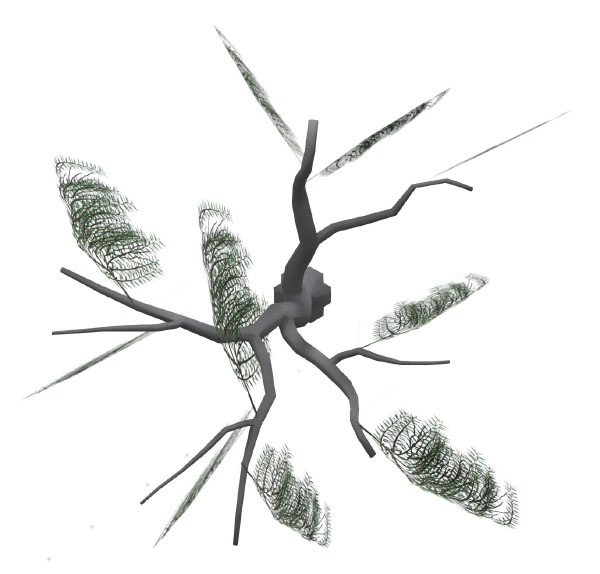
It’s important to take multiple angles in to consideration here; while it’s not always possible for an object to look good from all angles, the goal here is to create visual interest through a play between areas where there are foliage and areas where there are not.

There’s still a ways to go in terms of filling out volume from the top-down view, but progress is being made!

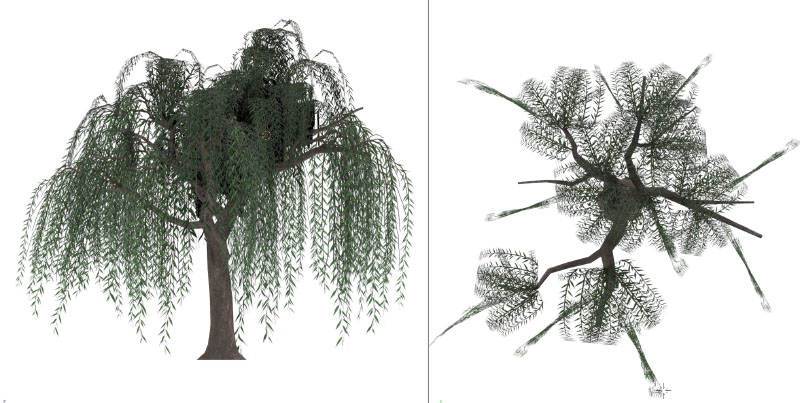
My immediate priority is to create an effective silhouette along the top surface of the tree. Then, I do the same working from a top-down view, taking care to create leaf cover in trunk/branch areas which are still bare.

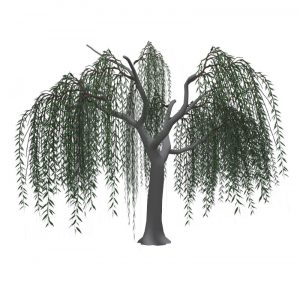
It’s during this stage that some experimentation in balancing the different foliage geometry shapes is important. I started out using a variety of upright planes to create the impression of volume from the front view, but adding rounded foliage makes a big difference! There’s still a lot of push and pull to go, but this has come a long way compared to the tree we were left with by the end of last week’s post.

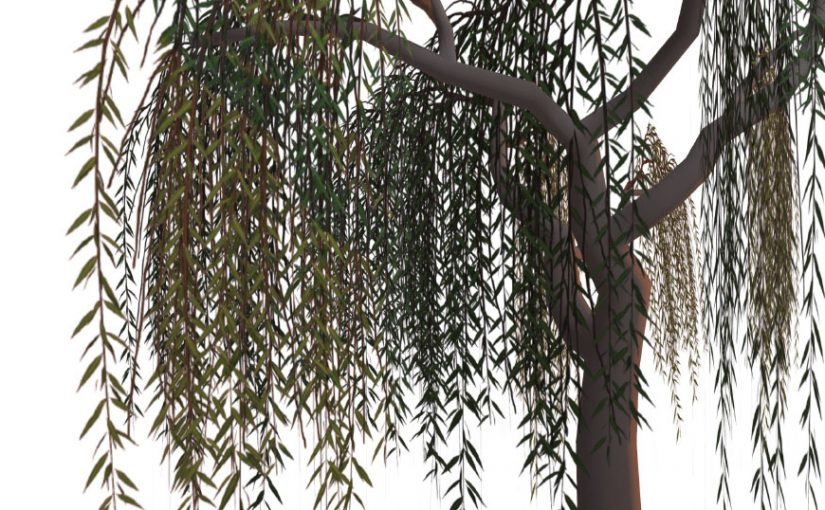
Also, you might notice that I got around to texturing the trunk; this was accomplished by importing a .OBJ copy of the trunk to Substance Painter and working with the tools therein.

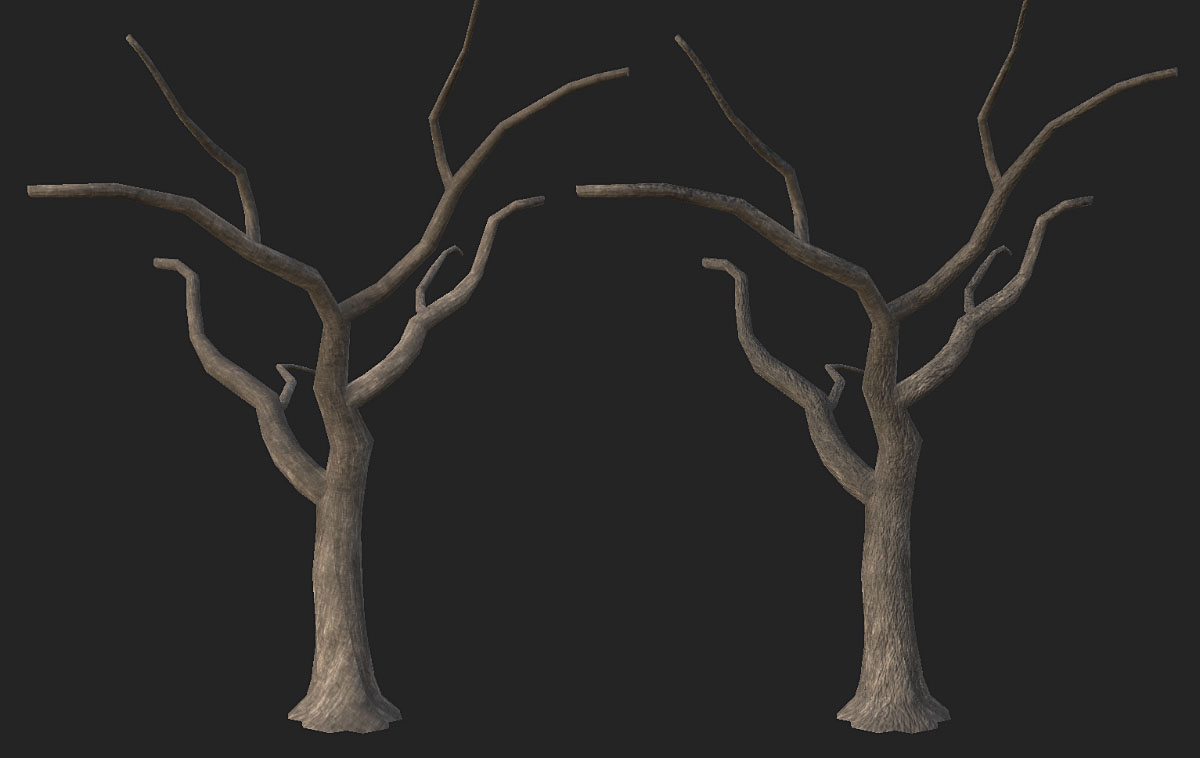
I usually start with a base wood material, but never leave it as is. For one thing, Substance Painter still isn’t smart enough to figure out how to hide seams, and for another, I like to add a lot of little touches to make the look a little more unique.

In this case, I created another layer overtop of the wood and used a scratchy brush to create the deep furrows this tree’s bark tends to have. The brush included both a diffuse and height element so that I could give the impression of accumulated dirt and shadow, paying particular attention to seams and minimizing the tonal differences in these areas.

I then also made use of a particle brush to blow some dust and grime all over to add a bit more age and wear to the texture.

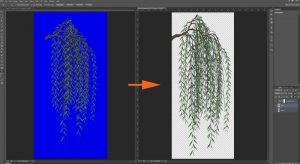
These textures were then exported using my usual PBR SpecGloss configuration (the default preset in the exporter) and added back to the model in Blender for one more rendering pass, since I wanted just a bit more kick than the plain textures would provide, given SL’s existing material shaders (somewhat limited).

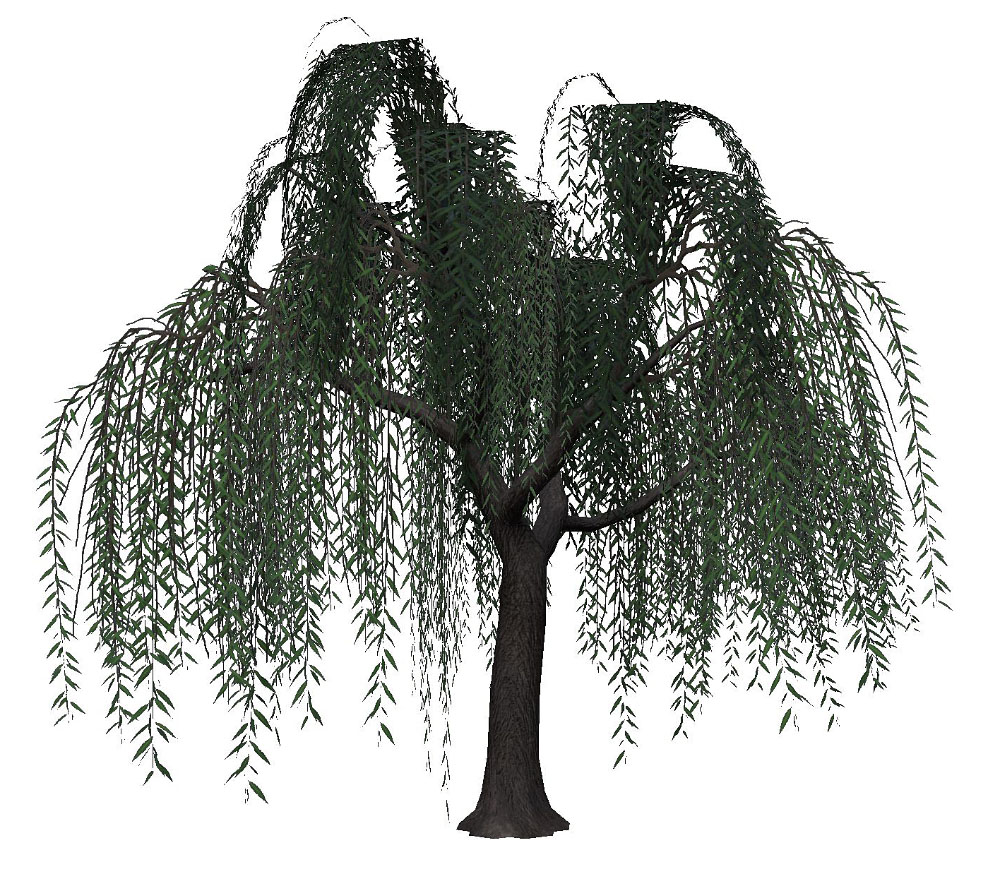
Moving forward, I’m likely to do a bit more balancing of foliage to make it a bit more subtle, but the basics are there.

Next week, I hope to have enough time to experiment with rigging & animations, plus consider the feasibility under current testing conditions.


If you found this or any other of my articles helpful, please consider becoming a Patron! Doing so supports further articles of this kind and my content creation in general.  Alternatively, if you like the sorts of things that I make for Second Life, drop by my Marketplace listing or my in-world stores and check out what I have to offer!

Unless otherwise noted, I (Aki Shichiroji) and this blog are not sponsored in any way. My thoughts are my own and not indicative of endorsement by any associated or discussed product/service/company.


Willow Tree Process (Part 2)

Today, I figured I’d touch on my process for creating textures.

While many folks prefer to use a photograph for their texture, I’ve always worked from scratch, creating my own textures digitally, while referencing a large number of photographs for ideas and clues about growth habit.

With respect to trees, I usually start with a few variations on a base leaf, taking care to work out the base silhouette.

In the case of weeping willows, the leaves are narrow,oblong, and taper gradually. While the final  product will ultimately be much smaller and not show small details like serrated edges, I usually add them anyway, along with veins so that these elements can give hints of themselves later.

It’s usually a good idea to create a variety of different leaves, even if they are a slight modification of one base shape. This allows the final branch texture to have some variation to it, even if, at a distance, the differences are small.

Sometimes, the use of traditional media for texturing is helpful too. I have used my share of drawing tablets but (even considering the use of Cintiq tablets) none of them can truly replicate the intuitiveness of simply taking pen or pencil to paper and simply drawing.  Sometimes, it’s just easier to sketch out a base to work from, clean it up or paint over it, rather than drawing and erasing ad nauseum via tablet, and this is what I’ve done here.

This and some other branches were drawn with pencil, scanned, cleaned up and painted over.  Using this process, I was able to put together a sideways branch, which is now at a prime stage for the addition of leaves in Blender.

I usually start by unwrapping the UV of a plane to fill the whole area of a UV layout matching the proportions of my leaf texture. In the Node Editor, this object gets assigned a material with the leaf texture as a diffuse map. I additionally assign transparency to the material, using transparency from the texture to be the deciding factor in what gets rendered.

The plane gets cut up so that each piece of geometry gets a different leaf. I then also bring in the branch texture and put it on a vertical plane object (using a similar node setup as above) by adding it to my Diffuse Map node in the Node Editor.

Once this is in place, I divide the Blender windows such that I can view a preview in Render mode on one side as well as edit in either Texture or Wireframe mode on the other. This allows me to move leaf textures to match the branch texture relatively quickly, while still seeing the results (and how the transparent textures interact with each other) in real-time.

In this case, leaf geometry was laid out and duplicated with an Array modifier and also given a curve modifier, so that the geometry would conform to an extruded curve (to act as a stem). This allowed me to move and deform the long string of leaves in any way I wanted.

Special consideration is made to maintain variation and depth. Being able to use a 3D program to put together this texture means that I can take the time to create parts of the foliage which move forward or recede. Setting my texture workflow up this way also means it would be easy to replace the leaf texture later for other texture sets (fall colours, for example).

Once I have an arrangement I’m happy with, I add a solid emissive blue background, set up some appropriate lighting, position the camera and take a render (F12) of the camera view.

The result gets saved and opened in Photoshop. I select as much blue as possible, then delete it from the layer, leaving behind a transparent background. I then add a Hue/Saturation adjustment layer and de-saturate any remaining blue colour on the preceding layer.

Any additional cleanup should be done to the texture at this stage. I save a .PSD file as well as a .PNG at full size, then I repeat the placement process for branches along the full trunk. Once I have finalized placement, the file gets saved again as a .TGA, with an appropriate background & alpha channel and at a more SL-appropriate image size.

There can be a lot of experimentation at this stage and the solution, for trees, isn’t always a flat billboarded texture. As it stands, this tree still looks a little spare!

In my next article, I’ll show what additional geometry and texture work goes in to making the tree look believable from multiple angles.


If you found this or any other of my articles helpful, please consider becoming a Patron! Doing so supports further articles of this kind and my content creation in general.  Alternatively, if you like the sorts of things that I make for Second Life, drop by my Marketplace listing or my in-world stores and check out what I have to offer!

Unless otherwise noted, I (Aki Shichiroji) and this blog are not sponsored in any way. My thoughts are my own and not indicative of endorsement by any associated or discussed product/service/company.