Just a note! Apologies for the late post. Due to some unforeseen local circumstances, I’ve been really occupied this week prepping proposals at work and dealing with RL circumstances. With that said, this article is gonna run long, so I’m splitting it in two more manageable sections.
Let’s begin!
Repositioning joints
The joint editing process has been refined a bunch lately – particularly with the most recent iteration of Avastar’s 2.X plugin, which now only works with Blender 2.79 and above.
Of note, the folks behind Avastar were able to iron out pretty much all of the kinks when it comes to ‘snapping’ one set of armature bones to the other and vice-versa. Whereas previously there were some issues with spine bones not translating properly, they seem to work well now. I can’t say that I’ve tried doing any significant constraint editing yet (such as in previous cases with the weeping willow and drider rigs) but I’m happy to see this functionality relatively stable now.
With the current setup, you can select your Avastar armature in Object mode, then switch to edit mode and either select Animation bone groups or Deform bone groups to work with from the Avastar tab menu on the left-hand side.
Joints can be repositioned by selection and translation, just as you would a vertex, edge or face.
If you are significantly changing the position of the hip and shoulder joints, also be sure to click ‘Enable’ next to ‘Structure’ on the Rig Config menu to allow structural joints in those areas to move, otherwise you’ll have a hard time moving the heads of mCollar/Collar and mHip/Hip bones. Additionally, somewhere along the way, Blender did finally fix X-mirroring for armatures, so you should definitely make use of this tool (found in the ‘Options’ tab when you’re in Edit Mode for your armature) in cases where you would like to maintain symmetry across your armature.
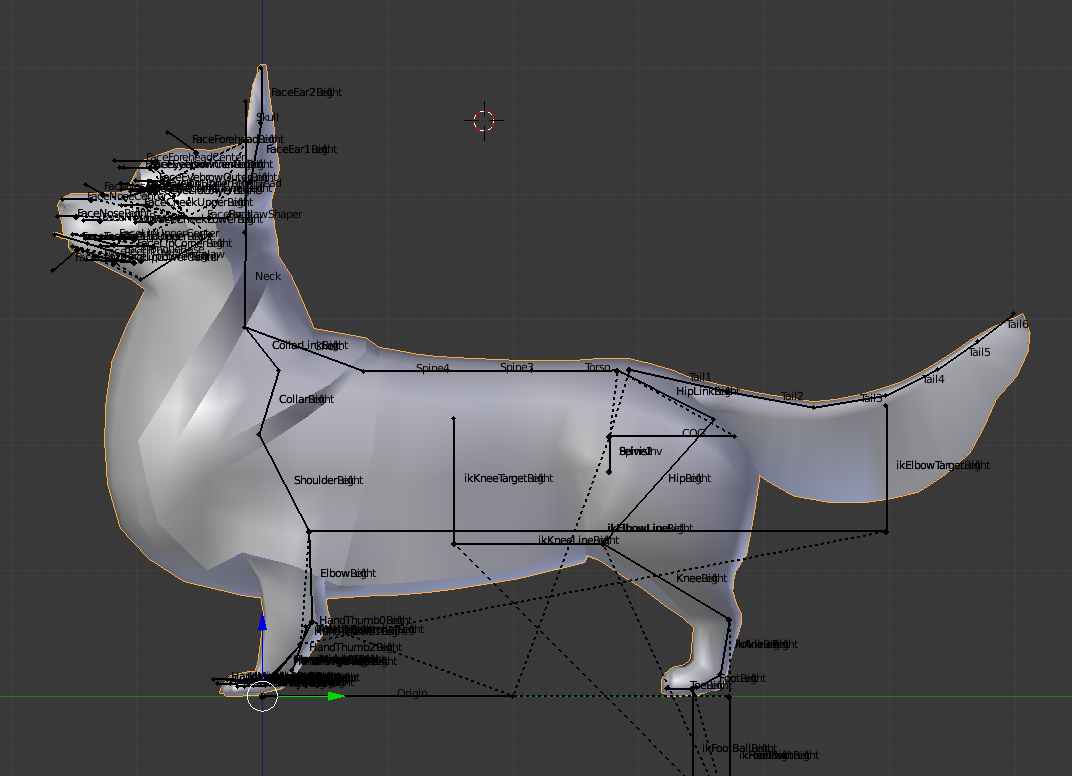
Here, I referenced dog skeletons and bone placement for general positioning. It might seem like the outer shape is what one should pay attention to when rigging, but It’s important to pay attention to analogous joint positions in your critter’s real-life counterpart and to position your own to similar positions. This will help to keep your animations as natural as possible later.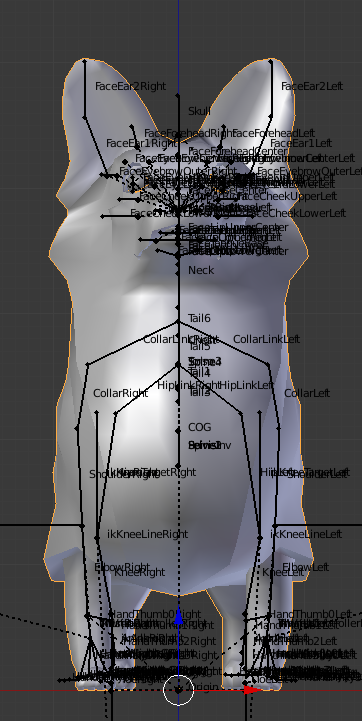
Once the joint positions are roughly where they need to be with the Animation bone group, ensure that the corresponding Deformation bone group positions are in place by clicking ‘Cleanup Rig’ with ‘Target Animation Bone Group (green bones) selected in the following menu.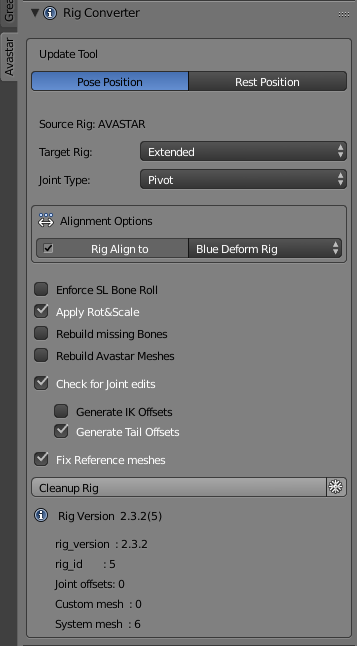
The alternative is to simply show both the Animation AND Deformation bone groups while in Edit mode and to adjust their joints concurrently.
You can check that the effect has been applied correctly by toggling visibility of said bone groups and ensuring that they match and overlap precisely. Once you have ensured that this is the case, it’s time to parent the avatar mesh to the skeleton.
The next post will be up in the next couple of days – in the mean time, If you like what you see but don’t think it’s quite right for you, perhaps consider donating to my Patreon? Your continued support helps to produce weekly content (written, modelled, animated or otherwise) and helps to keep original content creation in Second Life!